
Sending Tasks via Email
DTS allows you to easily send selected or filtered tasks to previously specified email addresses.
Tasks to be sent by email can be selected by
-
Selecting one or more tasks in the outline.
-
Specifying a date range within which the required tasks fall.
-
Using an DTS task filter.
-
Searching for an email address to which a task is assigned.
Before you can email tasks, DTS must know to which email address/s it must send the selected tasks. Email addresses are created as a dedicated text field and this text field contains the required email for each task.
To assign email address to tasks:
-
Set up a text field that will be used to contain the email address. For ease of use name the text field EMAIL or something similar.
-
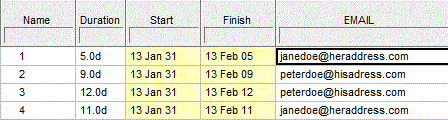
Add one or more email addresses to the EMAIL text field for each task. A single task's EMAIL text field can contain more than one email address. Addresses are separated by a comma (,) or semi-colon (;).
To send selected tasks by email:
-
Select the required tasks in the outline.

-
Select Tools >> Send Mail.

-
Ensure that the Selected Tasks option is selected.
-
Skip to the last section Sending the email below.
To send tasks based on a date range:
-
Select the Filtered Tasks option.
-
Select the Days before current date option in the Filterssection. Fill in the Days before current date and Days after current date fields.
-
Skip to the last section Sending the email below.
Note: The current date in this context is the date set in the Current Date form, which may be different from the current calendar date.
To send tasks based on an DTS task filter:
1. Select the Filtered Tasks option.
2. Select the Task filter option and select a task filter from the list.
3. Skip to the last section Sending the email below.
To send tasks based on the email address text field
-
Select the Filtered Tasks option.
-
Select the Find portion of email address option and fill in part of or the complete email address.
-
Skip to the last section Sending the email below.
Sending the email
After having proceeded through the steps listed in the previous sections, proceed with selecting the last few options.
-
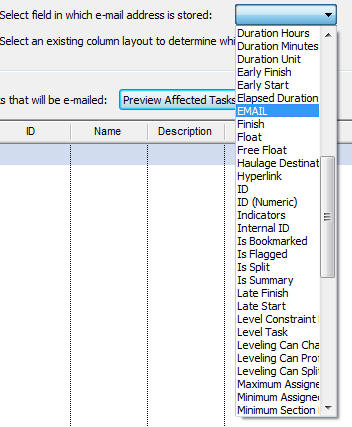
Select the text field in which the email addresses are stored from the drop-down list, for example EMAIL.
-
Select an existing column layout to determine which fields to send out.
-
Click Preview Affected Tasks.
A list of tasks to be emailed is displayed.
-
Click Send.